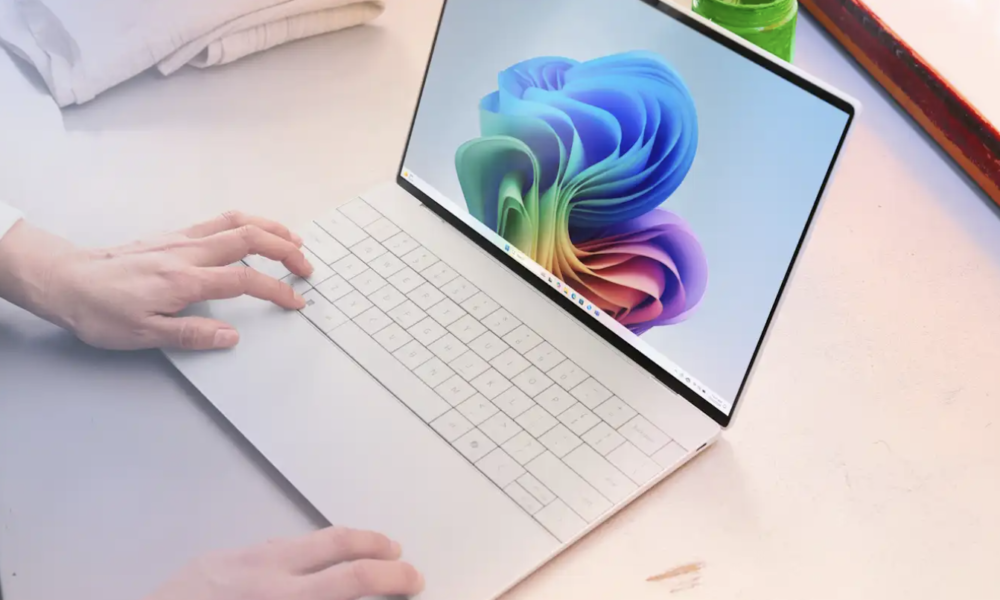
Windows 11’s new Start menu is more than just a visual refresh. It’s a different way of working with your PC, designed to be calmer, cleaner, and a lot more focused. If you’ve just upgraded or you’re thinking about it, understanding the 7 useful things in Windows 11’s new Start menu can help you get the best out of your system every single day.
Instead of live tiles and a busy layout, the new Start menu gives you a simple grid of apps, a smart Recommended section for recent files and programs, and a powerful search box that ties everything together. Whether you’re working from home, running a small business, studying, or just using your PC for everyday tasks, the Start menu is now a central hub that saves you clicks and time.
In the sections below, we’ll walk through each of the seven most useful parts of the Windows 11 Start menu, show you how to use them, and explain how they can fit into your daily routine.
Understanding the Windows 11 Start menu at a glance
Before we dive into the seven useful things, it helps to understand the big picture. The Start menu in Windows 11 is built around three main zones:
- Pinned apps at the top
- Recommended files and apps in the middle
- The bottom row with your user profile, power options, and a button to open All apps
This simple layout is one reason many users feel less overwhelmed compared to older versions.
If you’re planning to upgrade your device to make the most of Windows 11, be sure to check out our Best Cheap Laptops 2026 – Buyer Guide for budget-friendly options that run it smoothly.
What changed from Windows 10 to Windows 11
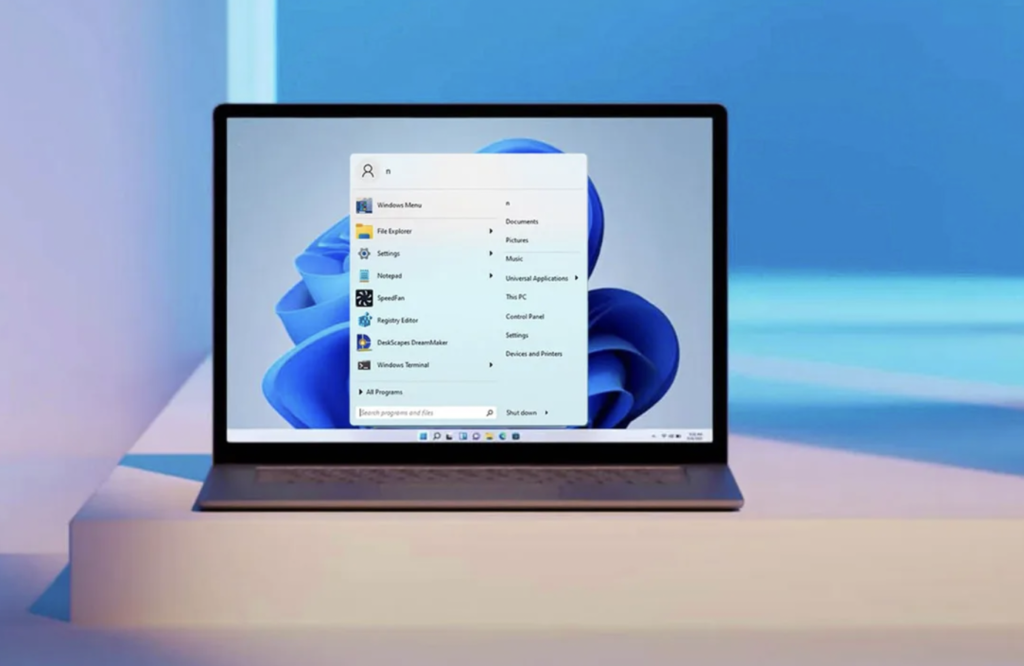
If you’re coming from Windows 10, the most obvious changes are:
- No live tiles: The moving, updating tiles are gone. Apps are now shown as simple icons in neat rows.
- Centered placement: By default, the Start button and your pinned apps sit in the center of the taskbar, not the left edge.
- New Recommended section: Instead of showing many tiles, the Start menu highlights your recent documents and apps.
- Simplified right-click menus: Context menus and Start related actions have cleaner designs.
These changes make the new Start menu feel less like a busy dashboard and more like a focused launcher.
Why the new Start menu matters for everyday users
The goal of the Windows 11 Start menu is simple: get you from “I want to do this” to “I’m doing it now” faster. For everyday users, that means:
- Finding apps with fewer clicks
- Opening recent files directly without hunting through folders
- Using search to jump straight into settings or system tools
- Customizing the layout so the things you use most are always within reach
Throughout this article, you’ll see how the 7 useful things in Windows 11’s new Start menu all support that goal.
1. Centered design and clean layout make focusing easier
One of the first things you notice after installing Windows 11 is the centered taskbar and Start button. This design change isn’t only about looks; it’s also about comfort and focus.
The new centered taskbar and Start button
By default, the Start button appears in the middle of the taskbar, alongside your pinned and running apps. This has a few practical benefits:
- Less eye movement: Your eyes naturally rest near the center of the screen, especially on wide monitors. Having Start there means less side-to-side movement.
- Better for large screens: On an ultrawide or big desktop monitor, reaching the far-left corner can be slightly annoying. The centered Start feels easier to reach.
- Consistent layout: Because apps open from the center, they often feel more balanced on-screen.
If you’re not a fan of this change, don’t worry you can move Start back to the left, which we’ll cover later.
Cleaner visual hierarchy and less clutter
The Windows 11 Start menu drops the noisy elements from previous versions and sticks to a calm, structured design:
- No live tiles or animated icons: This reduces visual noise and distractions.
- Simple grid of icons: Pinned apps appear in neat rows, so scanning the list is faster.
- Clear separation between Pinned and Recommended: Your brain doesn’t have to guess where things are.
This kind of layout is especially helpful when you’re tired or switching tasks quickly. You can open Start, glance at the screen, and immediately know where to click.
Accessibility and comfort for long work sessions
For users who spend long hours at a PC, including many professionals in Singapore and elsewhere, small design changes can make a big difference:
- Easier on the eyes: Fewer moving elements and more whitespace reduce strain.
- Better support for touchscreens: Larger click targets and simple layouts help if you use a 2-in-1 laptop or tablet.
- Predictable positions: Icons don’t constantly rearrange themselves like live tiles sometimes did.
Over time, this steady, predictable design makes the Start menu feel like a reliable “home base” for all your tasks.
2. Pinned apps: your personal command center
The Pinned section is probably the feature you’ll use most in Windows 11’s Start menu. Think of it as your personal command center—your favorite apps are always in the same place, ready to go.
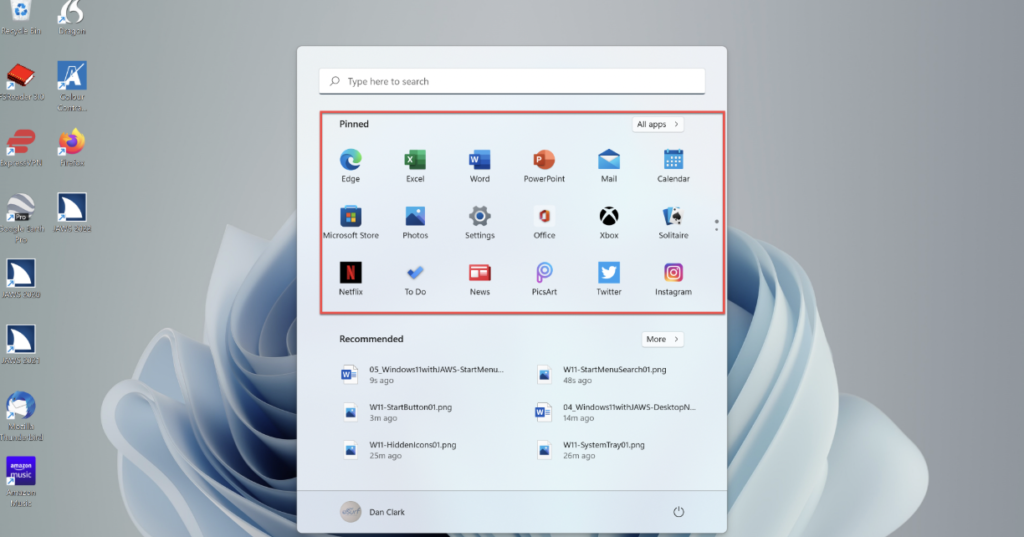
How to pin, unpin, and rearrange apps
You can shape the Pinned area to match your routine:
To pin an app to Start:
- Click the Start button.
- Select All apps from the top-right corner of the Start menu.
- Find the app in the list.
- Right-click the app and select Pin to Start.
To unpin an app:
- Open Start.
- In the Pinned section, right-click the app icon.
- Choose Unpin from Start.
To rearrange apps:
- Open Start, click and hold on an app icon, then drag it to a new position.
- Drop it where you want. The other icons shift automatically.
With a little effort, you can build a layout that feels natural and saves real time.
Organizing pinned apps for work, school, and home
Many users switch between roles across the day—worker, student, parent, or gamer. You can arrange pinned apps into “zones” that match these roles:
- Work zone: Pin tools like Microsoft Teams, Outlook, Excel, and your browser near the top-left.
- Study zone: Group apps like OneNote, Word, and PDF readers together.
- Home and entertainment zone: Place Spotify, Netflix, or your favorite games slightly lower down.
- Tools and utilities: Keep Settings, Calculator, and Snipping Tool in a consistent row so they’re easy to find.
You don’t need labels or folders to do this. Simple positioning creates a mental map you’ll quickly remember.
Practical layouts for productivity and focus
Here’s one example of a practical layout for a typical office or home user:
- Top row: Edge or Chrome, Outlook, Teams, File Explorer
- Second row: Word, Excel, PowerPoint, OneNote
- Third row: PDF reader, Zoom, Calendar, To Do / task app
- Fourth row: Settings, Photos, Snipping Tool, Calculator
You can of course mix in other apps you use daily, like bookkeeping software or design tools. The key is to keep your most-used apps at the top, where your eyes land first.
Because the Pinned section is so central to how you use Start, it’s one of the 7 useful things in Windows 11’s new Start menu that’s worth customizing early on.
3. All apps view: everything in one predictable place
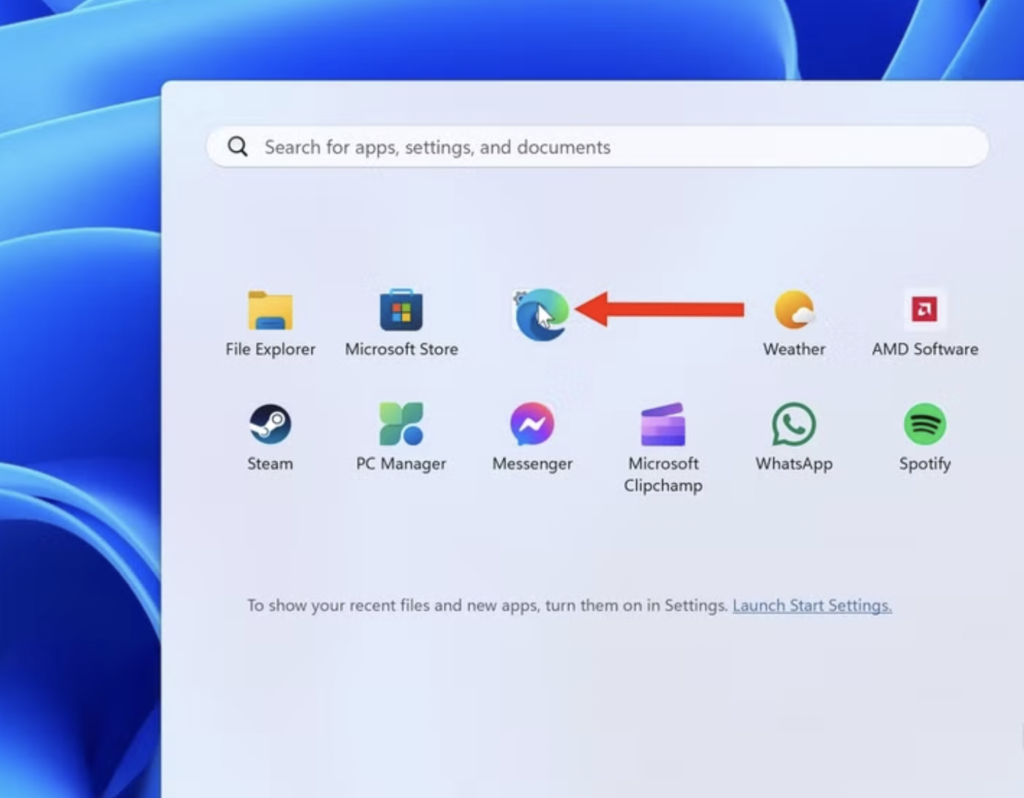
Even with a well-organized Pinned section, you’ll sometimes need an app that isn’t on your main grid. That’s where All apps comes in.
Opening and navigating the All apps list
To open the full list:
- Click the Start button.
- In the top-right corner of the Start menu, click All apps.
You’ll now see every installed app, arranged in a simple list.
To jump back to your Pinned view, click the left-facing arrow at the top of the list.
Alphabetical navigation and search shortcuts
In the All apps view, apps are sorted alphabetically and grouped by starting letter:
- On the right side, you might see quick letter shortcuts (depending on your layout and language).
- You can scroll or press a letter on your keyboard to jump closer to the app you want.
For instance:
- Press S on your keyboard to move to apps starting with “S” (like Settings, Spotify, or Steam).
- Press E to move near Edge or Excel.
If you’re not sure exactly where an app sits in the list, don’t forget that the Start menu has powerful search built-in. Just start typing the app’s name after you open Start.
Keeping the All apps list tidy and manageable
Over time, your All apps list can get crowded, especially if you try lots of software. You can keep it manageable by:
- Uninstalling apps you never use:
- Right-click the app in All apps.
- Select Uninstall (if available).
- Hiding or removing unwanted shortcuts:
- Some apps create multiple entries for tools or help files. Focus on the ones you actually need and uninstall extras where possible.
Because All apps is always available, you don’t need to pin everything. Reserve the Pinned section for daily tools and rely on All apps for occasional use.
4. Recommended section: recent files and apps at your fingertips
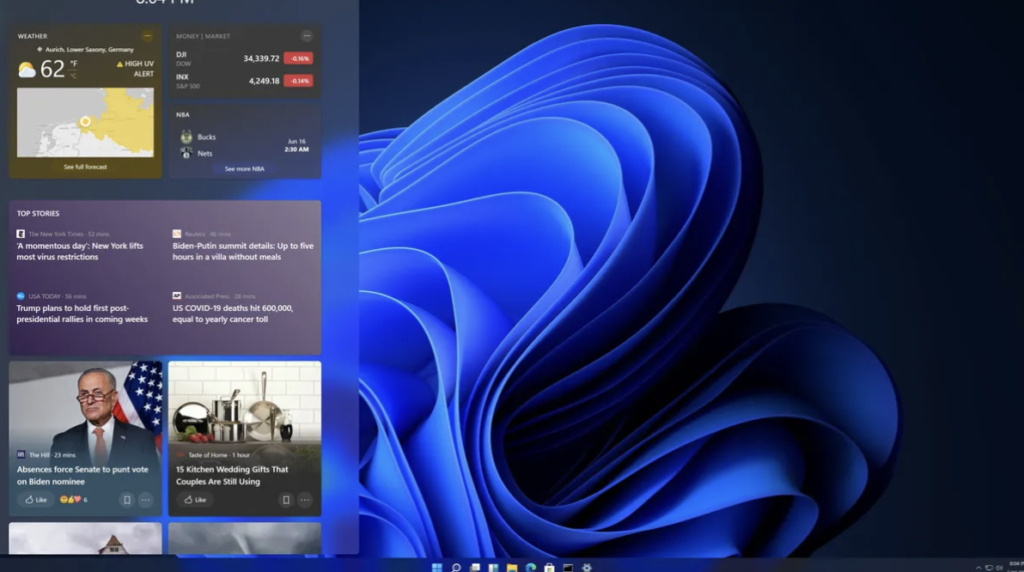
The Recommended section is one of the most useful and sometimes overlooked parts of Windows 11’s new Start menu. It uses your recent activity to show the files and apps you’re most likely to open next.
How the Recommended section works
You’ll find the Recommended area just below Pinned apps. It shows:
- Recently opened documents (Word, Excel, PDFs, and more)
- Recently opened or installed apps
- Sometimes recommended actions or shortcuts after major updates
Each item includes the file name, the app it opens with, and a small icon.
When you click any of these items, Windows opens it straight away. That means you can:
- Jump back into a Word report without opening Word first
- Reopen a school assignment right where you left off
- Open a photo you edited recently without browsing folders
Using Recommended for faster study and office work
In everyday use, the Recommended section can save a surprising amount of time:
- Office work:
- Start your day by clicking Start and choosing the last document you edited, like a proposal or report.
- No need to navigate through “Documents > Client > 2026 > Project” each time.
- Studying:
- Quickly reopen lecture notes or assignments.
- Switch between your main textbook PDF and your note-taking app.
- Home use:
- Get back to a budget spreadsheet, a recipe document, or a recent presentation.
Because it works across apps, Recommended becomes a crossroad for your most important activities.
Privacy controls for your Recommended content
Of course, not everyone wants their recent work showing up front and center, especially on shared PCs. Windows 11 gives you control over what appears there.
To manage this:
- Right-click an item in the Recommended list.
- Choose Remove from list if you don’t want that specific file to appear again.
For broader control:
- Press Win + I to open Settings.
- Go to Personalization > Start.
- Turn off options such as:
- Show recently added apps
- Display your latest files and documents in Start, jump lists, and File Explorer
This way, you can keep the convenience of Recommended without exposing sensitive files, which is especially important if you’re using a shared family PC or a device in a small office.
5. Powerful built-in search integrated into Start
Search has always been important in Windows, but in Windows 11 it’s tightly integrated into the Start experience. When you use the 7 useful things in Windows 11’s new Start menu together, the search box might be the one you rely on most.
Searching apps, files, and settings from one place
You can launch a search in two easy ways:
- Press the Windows key on your keyboard and just start typing.
- Or click Start, then click the Search box (or the Search icon on the taskbar).
From there, you can type:
- The name of an app (e.g., “Excel,” “Photos”)
- A document title (e.g., “invoice,” “assignment”)
- A setting (e.g., “Bluetooth,” “display,” “backup”)
- A control panel item (e.g., “device manager”)
Windows will show results grouped into categories like Apps, Documents, Web, and Settings.
Using filters and shortcuts in Windows search
Once the results appear, you can narrow them down:
- Use category tabs (such as Apps, Documents, Web) to limit the results.
- If you only want local files, stay in the Documents or Folders tabs instead of Web results.
Keyboard shortcuts help too:
- Win + S opens the search interface directly.
- After you type your query, pressing Enter launches the top result.
- Use the arrow keys to move up and down the results list, then press Enter to open the selected item.
This becomes second nature very quickly, and it can be much faster than hunting through folders.
Tips to make Start menu search more accurate
To help search work better for you:
- Use clear file names: For example, “clientA-invoice-Jan2026.xlsx” is easier to find than “new.xlsx”.
- Let Windows index important folders:
- Open the Settings app, then navigate through Privacy & security to the Searching Windows section.
- Choose Enhanced mode if you want broader search across all folders (this uses more resources but finds more files).
- Pin apps you use daily so they’re already at the top of the Start menu; then you can reserve search for occasional tools and documents.
Search turns the Start menu into a powerful command bar that lets you jump directly to what matters.
6. Customization options: make Start fit your workflow
Windows 11 gives you several ways to customize the Start menu so it matches how you work. You don’t need to leave everything at its defaults.
Moving Start left or center on the taskbar
If you prefer the classic look, you can move the Start button back to the left side:
- Right-click an empty space on the taskbar.
- Choose Taskbar settings.
- Scroll to Taskbar behaviors.
- Find Taskbar alignment and choose Left instead of Center.
This simple change can make long-time Windows users feel more at home, while still enjoying the modern Start menu.
Adjusting Start layout: more pins vs. more recommendations
You can choose how much space the Pinned and Recommended sections get:
- Open Settings with Win + I.
- Go to Personalization > Start.
- Under Layout, pick one of these:
- More pins – gives extra rows to pinned apps, fewer to Recommended.
- Default – balanced view.
- More recommendations – shows more recent files, fewer pinned apps.
For example:
- If you rely heavily on pinned apps and don’t often open older documents, pick More pins.
- If you constantly jump between documents and projects, More recommendations might serve you better.
Personalization, themes, and Start-related settings
From Personalization > Start, you can also:
- Show or hide recently added apps
- Show or hide recently opened items
- Control whether items appear in Jump Lists and File Explorer
Under Personalization > Colors and Themes, you can:
- Enable Dark mode or Light mode, which affects Start’s background and contrast.
- Choose Accent colors that highlight selected items in Start.
These small tweaks help the Start menu feel personal rather than generic, which can make it more pleasant to use every day.
7. Start menu as a hub for accounts, power, and quick actions
At the bottom of the Start menu, you’ll see a bar with your user profile picture, an icon for power, and sometimes quick links to Settings or other options. This small area plays a big role in daily use.
Power options: shut down, restart, and sleep in one click
To access power controls:
- Click Start.
- In the bottom-right corner of the Start menu, click the Power icon.
You’ll see options like:
- Sleep – saves power while keeping your session in memory.
- Shut down – exits your running programs and completely powers off the computer.
- Restart – turns your PC off and on again, refreshing the system.
Using these from Start keeps things simple and consistent, even if you don’t use any keyboard shortcuts.
Managing user accounts and profiles from Start
On the bottom-left of the Start menu you’ll find your account name and picture. Clicking this gives you actions such as:
- Change account settings – opens your Microsoft account or local account settings.
- Lock – locks your PC while keeping your session active.
- Sign out – closes your session and returns to the sign-in screen.
On shared PCs, especially in homes or small offices, this makes switching accounts much faster:
- One user signs out from Start.
- The next user signs in and gets their own personalized Start menu and settings.
Quick access to system settings and productivity features
Alongside your account and power options, the Start menu often shows direct links to important tools like:
- Settings
- File Explorer (from the taskbar, just next to Start)
- Certain system apps you choose to pin
This means that for most routine tasks—changing Wi‑Fi, tweaking display settings, adjusting language options—you can start from the Start menu and reach the right screen in seconds.
Advanced tips: using the Start menu like a power user
Once you’re comfortable with the basics, you can use the Start menu in more advanced ways to boost your productivity.
Keyboard shortcuts that boost Start menu efficiency
Here are some useful shortcuts:
- Win – open or close the Start menu.
- Win + X – open the Quick Link menu (fast access to Device Manager, Disk Management, and more).
- Win + S – open search directly.
- Win + E – open File Explorer without using Start, keeping your flow smooth.
- Win + L – lock your PC quickly when stepping away.
Combining these with a well-organized Start layout lets you operate your PC almost entirely from the keyboard if you want.
Combining Start menu with Snap Layouts and virtual desktops
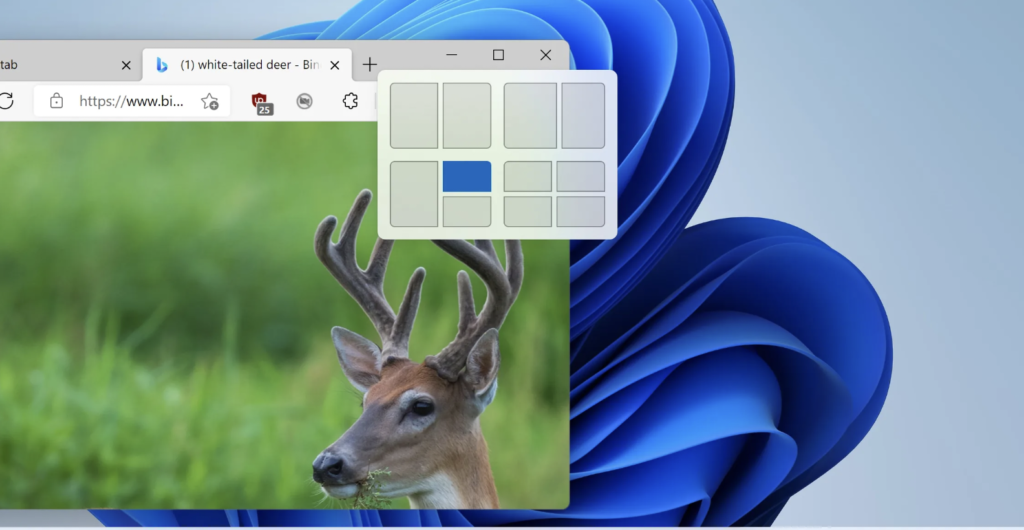
Windows 11 includes Snap Layouts and virtual desktops, which work well with the Start menu:
- Open an app from Start, then hover your mouse over the Maximize button to see Snap Layouts.
- Choose a layout (like side-by-side or grid) to organize your workspace.
- Use Win + Tab to create or switch virtual desktops for different tasks (work, personal, study).
You can then use the Start menu on each virtual desktop to launch related apps, keeping different areas of your life organized.
Managing multiple monitors and Start behavior
If you’re using multiple monitors:
- You can decide whether the taskbar and Start button appear on all screens or just the main one.
- Go to Settings > Personalization > Taskbar > Taskbar behaviors to adjust how buttons and icons show on each display.
This is especially useful in offices or home setups with docking stations, where clean, consistent behavior across screens makes daily work smoother.
Common problems and simple fixes for the new Start menu
Even with a polished design, problems can happen. Here are some common Start menu issues and simple ways to fix them.
When the Start button doesn’t respond
If you click Start and nothing happens:
- Try pressing the Windows key. If it still doesn’t open, continue.
- Press Ctrl + Shift + Esc on your keyboard to open the Task Manager.
- Find Windows Explorer in the list.
- Right-click it and choose Restart.
If the problem continues:
- Check for updates:
- Open the Settings app, head to Windows Update, and apply any updates that are waiting to be installed.
- Restart your PC fully using Ctrl + Alt + Delete if necessary.
Missing apps or search not showing results
If some apps don’t appear in Start or search doesn’t find files:
- Confirm the app is installed:
- Check in Settings > Apps > Installed apps.
- Reinstall the app if needed from Microsoft Store or the original installer.
- Rebuild Windows search index:
- Open the Settings app, go to the Privacy & security section, and then click on Searching Windows.
- Click Advanced indexing options (if available) and rebuild the index.
Also check that the folders where you store documents are included in the search index options.
Performance tweaks for a smoother Start experience
If the Start menu feels slow:
- Disable unnecessary startup apps:
- Open Task Manager (Ctrl + Shift + Esc).
- Open the Startup apps section and turn off any programs you don’t actually need to run at startup.
- Turn off some visual effects if your PC is older:
- In the Start menu, look up Adjust the appearance and performance of Windows using the search bar.
- Choose Adjust for best performance, or manually select the visual effects you want to enable.
- Keep your system updated:
- Settings > Windows Update for security and performance improvements.
These small steps can make opening and using Start feel much snappier.
Also Read:
If your current device is having issues and you’re unsure what to do next, our Singapore Laptop Repair Guide: Pricing, Service Types and Warranty Explained will walk you through all your repair options locally.
FAQs about Windows 11’s new Start menu
FAQ 1: Can I make the Windows 11 Start menu look like Windows 10?
You can’t fully restore the Windows 10 layout with live tiles using only built-in settings. However, you can:
- Move the Start button to the left (Taskbar alignment).
- Pin the same apps you used before.
- Turn off Recommended if you want a cleaner look.
There are third-party tools that try to mimic the Windows 10 Start menu, but using them is a personal choice and may affect stability or future updates.
FAQ 2: How do I stop certain files from showing in Recommended?
To hide individual items:
- Open Start.
- Right-click the file in Recommended.
- Choose Remove from list.
To stop recent items from showing at all:
- Go to Settings > Personalization > Start.
- Disable the option that displays your recent files in Start, jump lists, and File Explorer.
This is useful on shared PCs, especially in families or small offices in Singapore where privacy matters.
FAQ 3: Why can’t I drag tiles like in Windows 10?
Windows 11 no longer uses live tiles or tile groups. Instead, it uses a grid of simple icons. You can still:
- Drag icons to reorder them within the Pinned section.
- Move apps between rows.
But you can’t create resizable tile blocks like before. Microsoft simplified this to keep Start modern, clean, and predictable.
FAQ 4: Is the new Start menu better for touch devices?
Yes, many users find the new Start menu more comfortable on touch devices:
- The icons are more spaced out and easier to tap.
- The overall layout is simpler, which reduces accidental taps.
- Combined with new touch gestures in Windows 11, navigation feels smoother on tablets and 2‑in‑1 devices.
FAQ 5: How do I quickly find system tools from Start?
You can:
- Press Win, type the tool’s name (e.g., “Device Manager”, “Disk Cleanup”, “Control Panel”), then press Enter.
- Press Win + X to open the Quick Link menu for many admin tools.
- Pin frequently used tools to Start from the All apps list for one-click access.
FAQ 6: Does the Windows 11 Start menu work the same on all PCs?
The core design is the same, but small differences can appear:
- Business or school PCs managed by IT may have some items hidden or pre-configured.
- Some OEMs (PC manufacturers) may add their apps to your Start layout.
- Performance can vary depending on your hardware, especially on very old machines.
Still, the key features—Pinned, Recommended, All apps, and Search—work similarly across devices.
Conclusion: Making the most of Windows 11’s new Start menu
The 7 useful things in Windows 11’s new Start menu its centered and calming design, powerful pinned apps area, organized All apps list, smart Recommended section, integrated search, flexible customization, and built-in hub for power and account actions—come together to create a Start experience that’s simpler yet more capable than before.
If you:
- Arrange your pinned apps thoughtfully,
- Use Recommended to jump back into important work,
- Rely on search as your quick “command bar,” and
- Adjust alignment, layout, and privacy to suit your needs,
you’ll find that the Start menu quietly saves you time every day, whether you’re working, studying, or just relaxing at home.
Take a moment today to open Start, rearrange a few icons, and tweak a couple of settings. With only a small amount of effort, Windows 11’s new Start menu can become a powerful, personalized launchpad for everything you do on your PC.
Read More on Sgtrends